Profile Setup
After accepting the EULA, you’ll create your account by setting up your profile with your name, username, and password.
Account Creation
Empty Form
When you arrive at the profile setup page, you’ll see the following form:
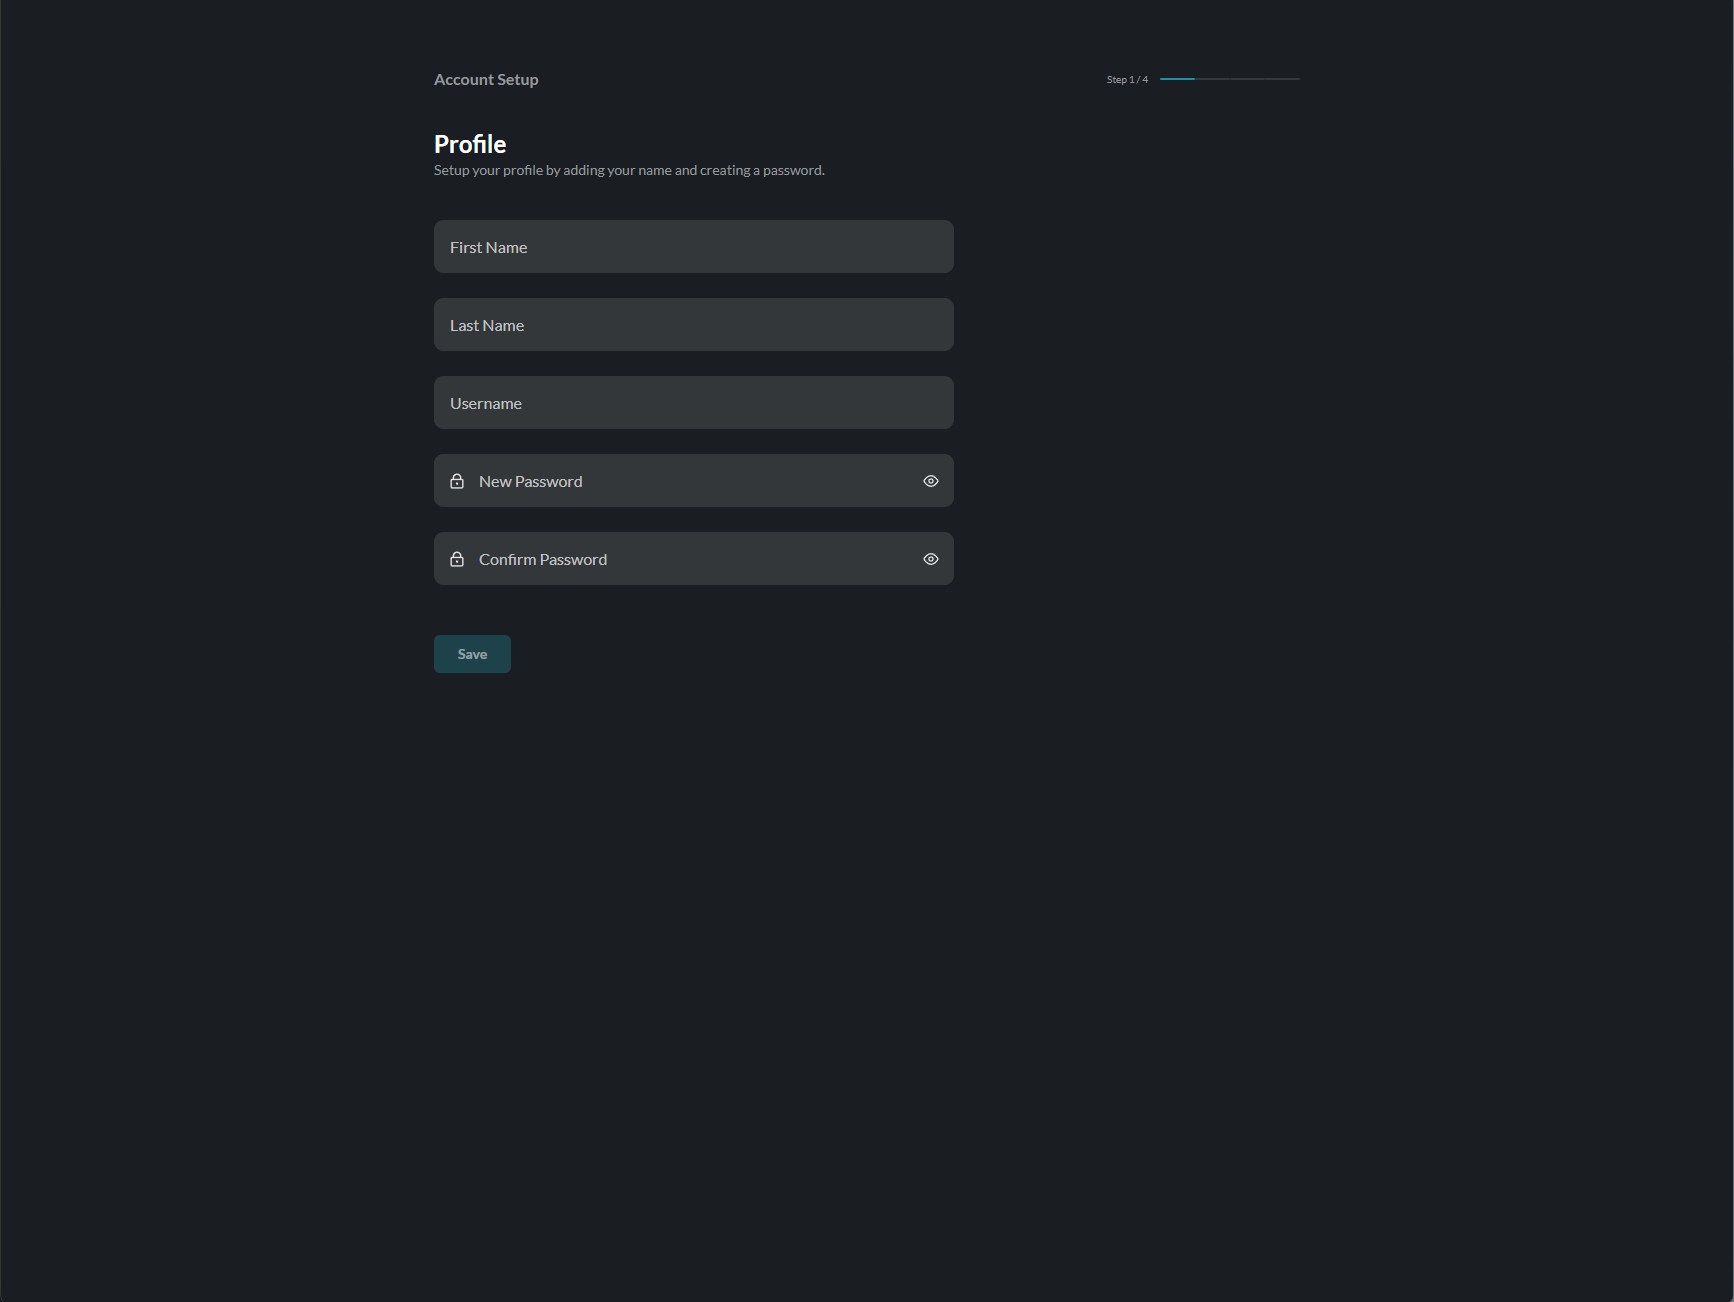
The form includes:
- First Name - Your given name
- Last Name - Your family name
- Username - Your unique login identifier
- New Password - Create a secure password
- Confirm Password - Re-enter your password
Completing the Form
Step 1: Enter Your Name
- Enter your First Name
- Enter your Last Name
- Choose a Username (this will be your login ID)
Step 2: Create a Password
When you start typing your password, the password rules panel will appear:
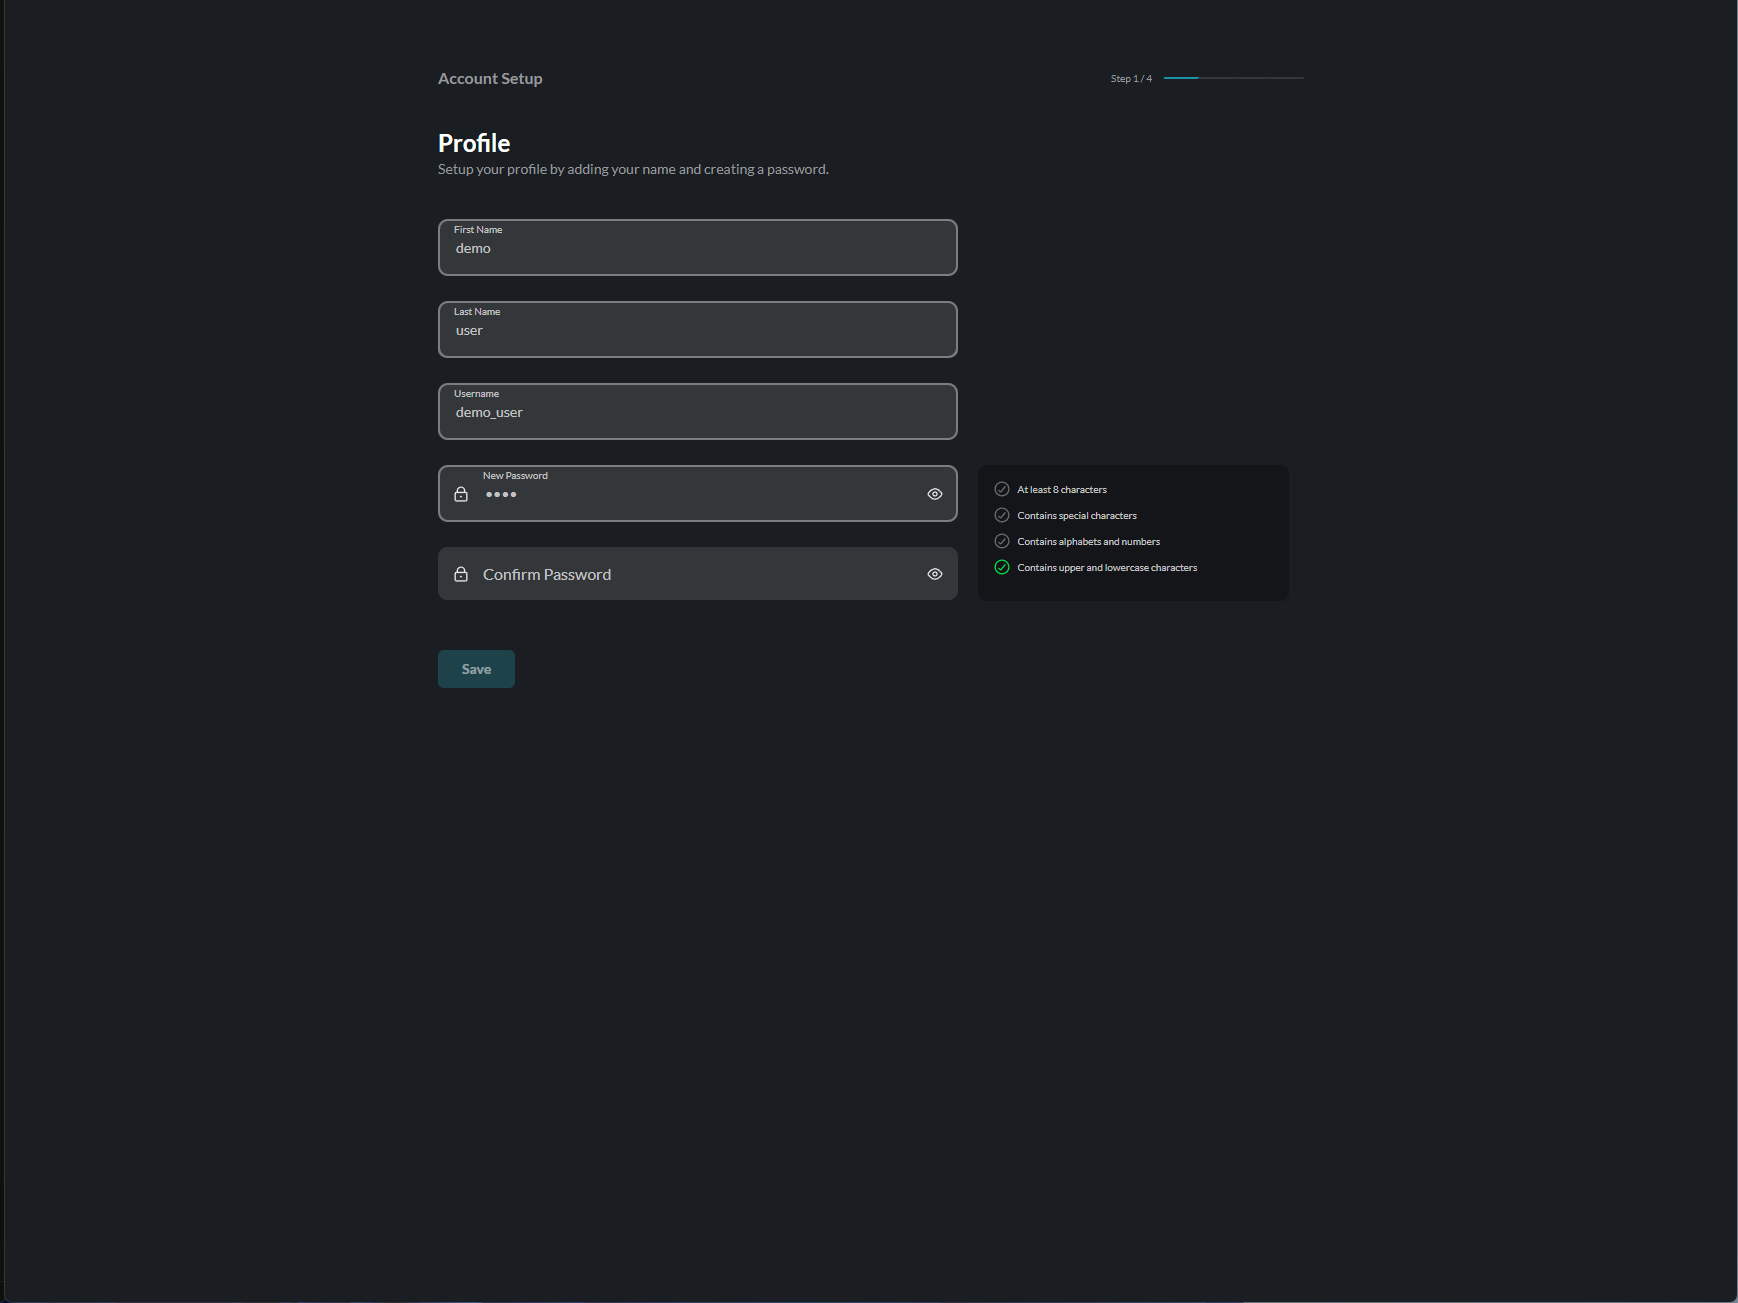
Your password must meet ALL of the following requirements:
| Requirement | Description |
|---|---|
| At least 8 characters | Minimum password length |
| Contains special characters | Include symbols like !@#$%^&* |
| Contains alphabets and numbers | Mix of letters and digits |
| Contains upper and lowercase | Both capital and small letters |
As you type, each rule will show a green checkmark when satisfied.
Step 3: Confirm Password
Re-enter your password in the Confirm Password field. It must match exactly.
Step 4: Submit
Once all fields are valid, the Save button will become active:
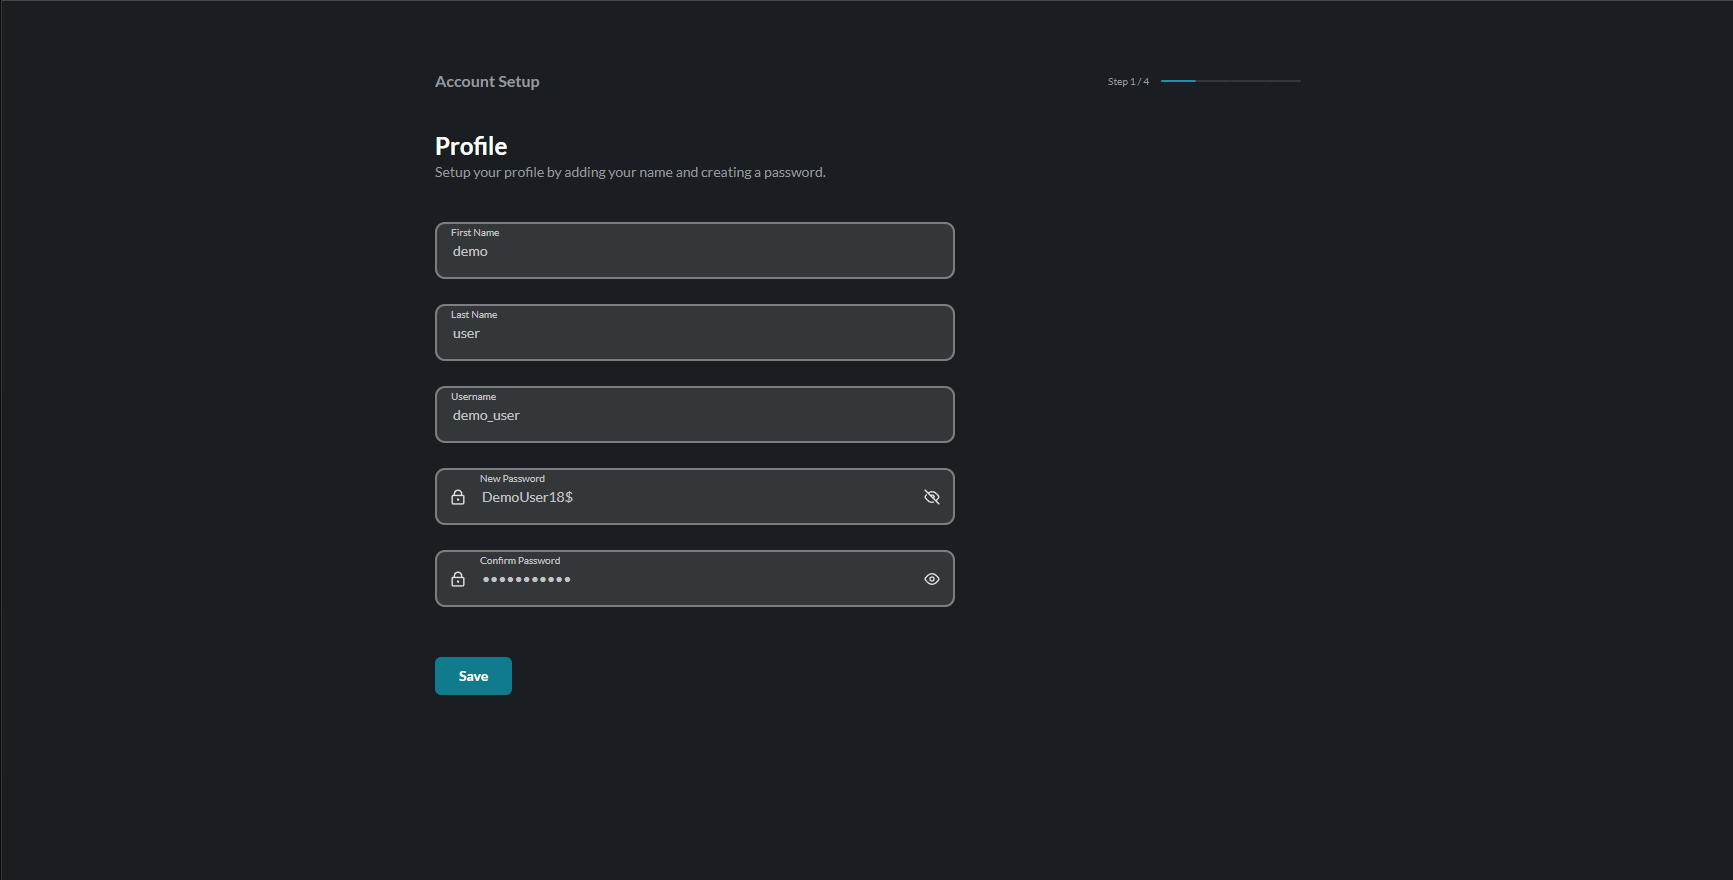
Click Save to create your account.
Error States
If there are validation errors, they will be displayed below the relevant field:
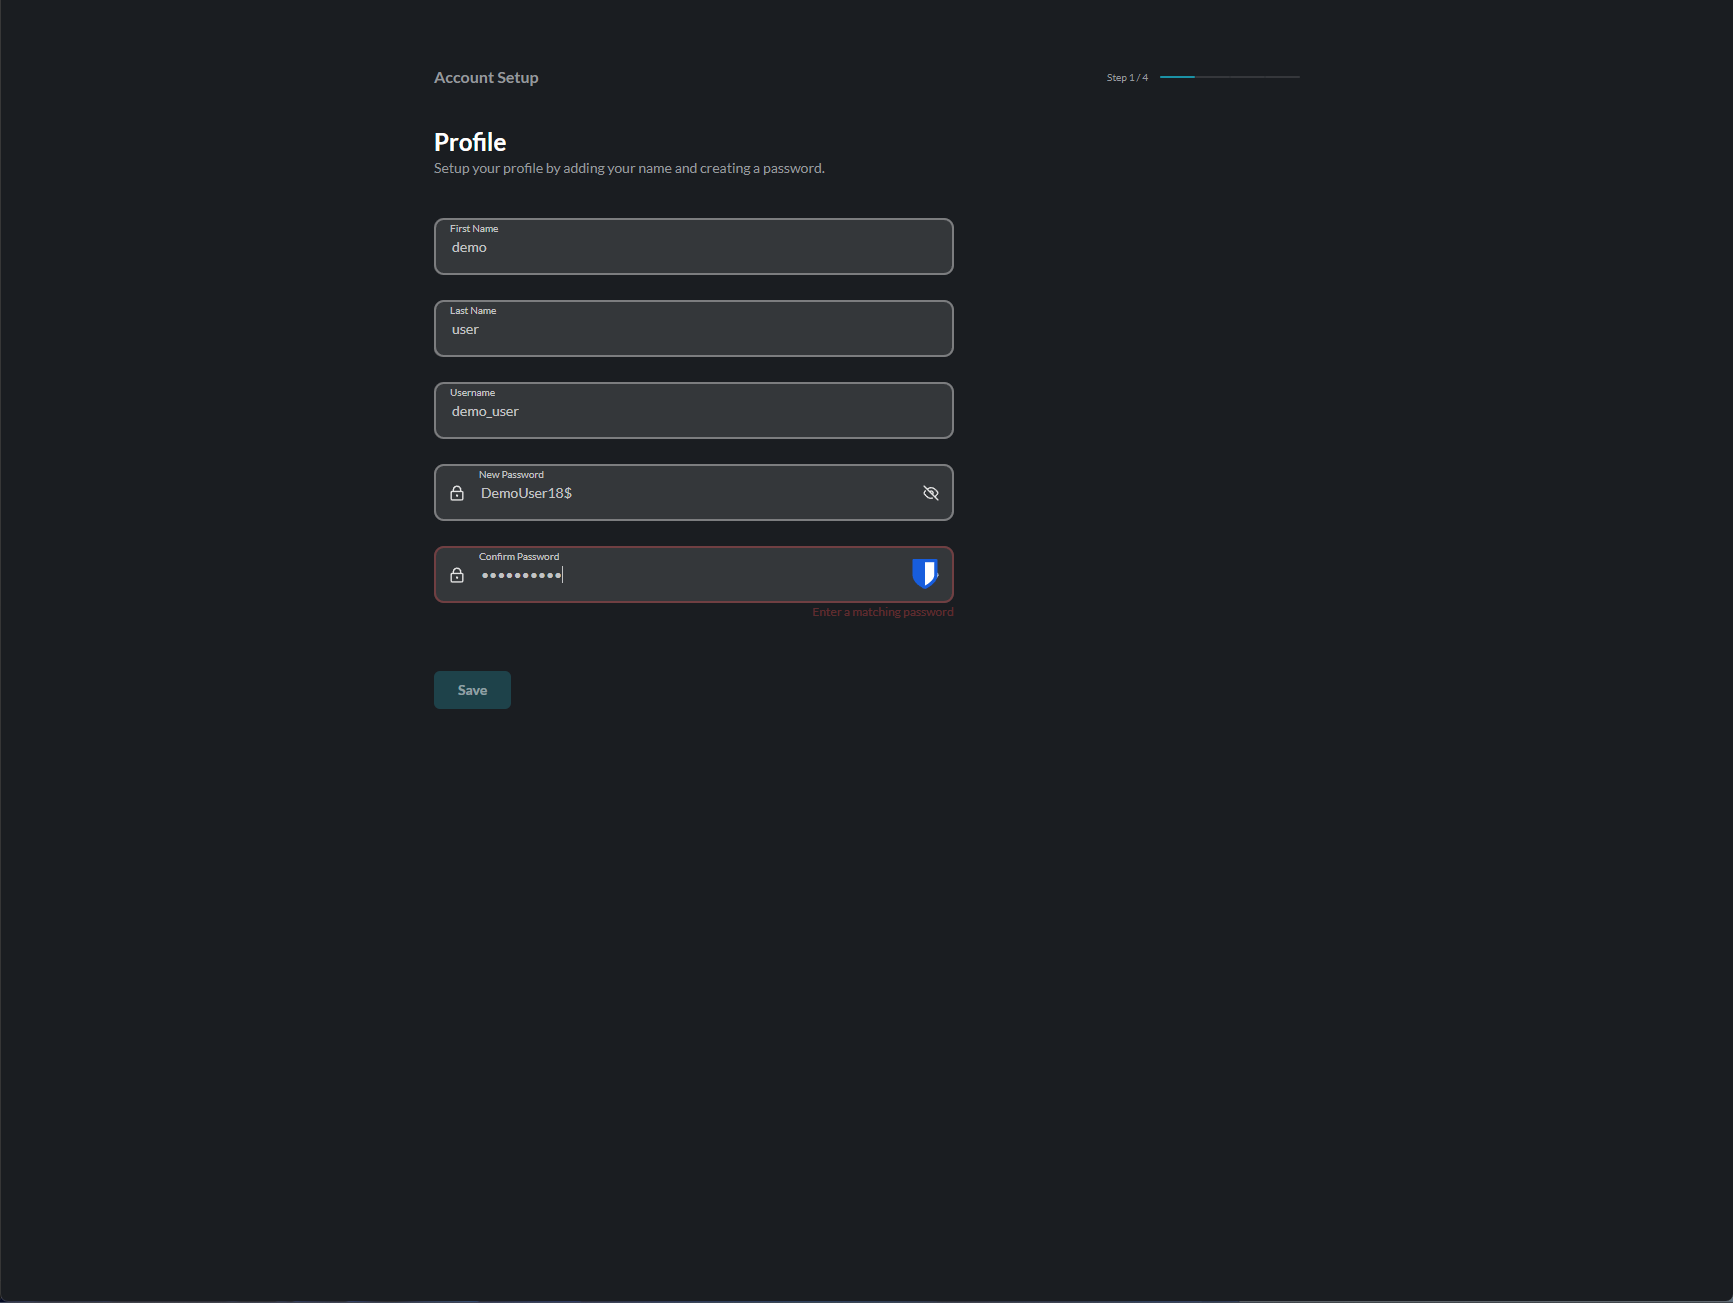
Common errors include:
- Name fields cannot be empty
- Username already taken
- Password doesn’t meet requirements
- Passwords don’t match
What Happens Next?
After successfully creating your account:
- All Users → Proceed to Two-Factor Authentication setup
- Managers → After 2FA, you’ll also set up Devices and Users
- Regular Users → After 2FA, you’ll go directly to the Home dashboard
Manager Setup
If you have a manager role, you’ll have additional setup steps after 2FA:
Device Management
Managers can add and organize devices for their organization:
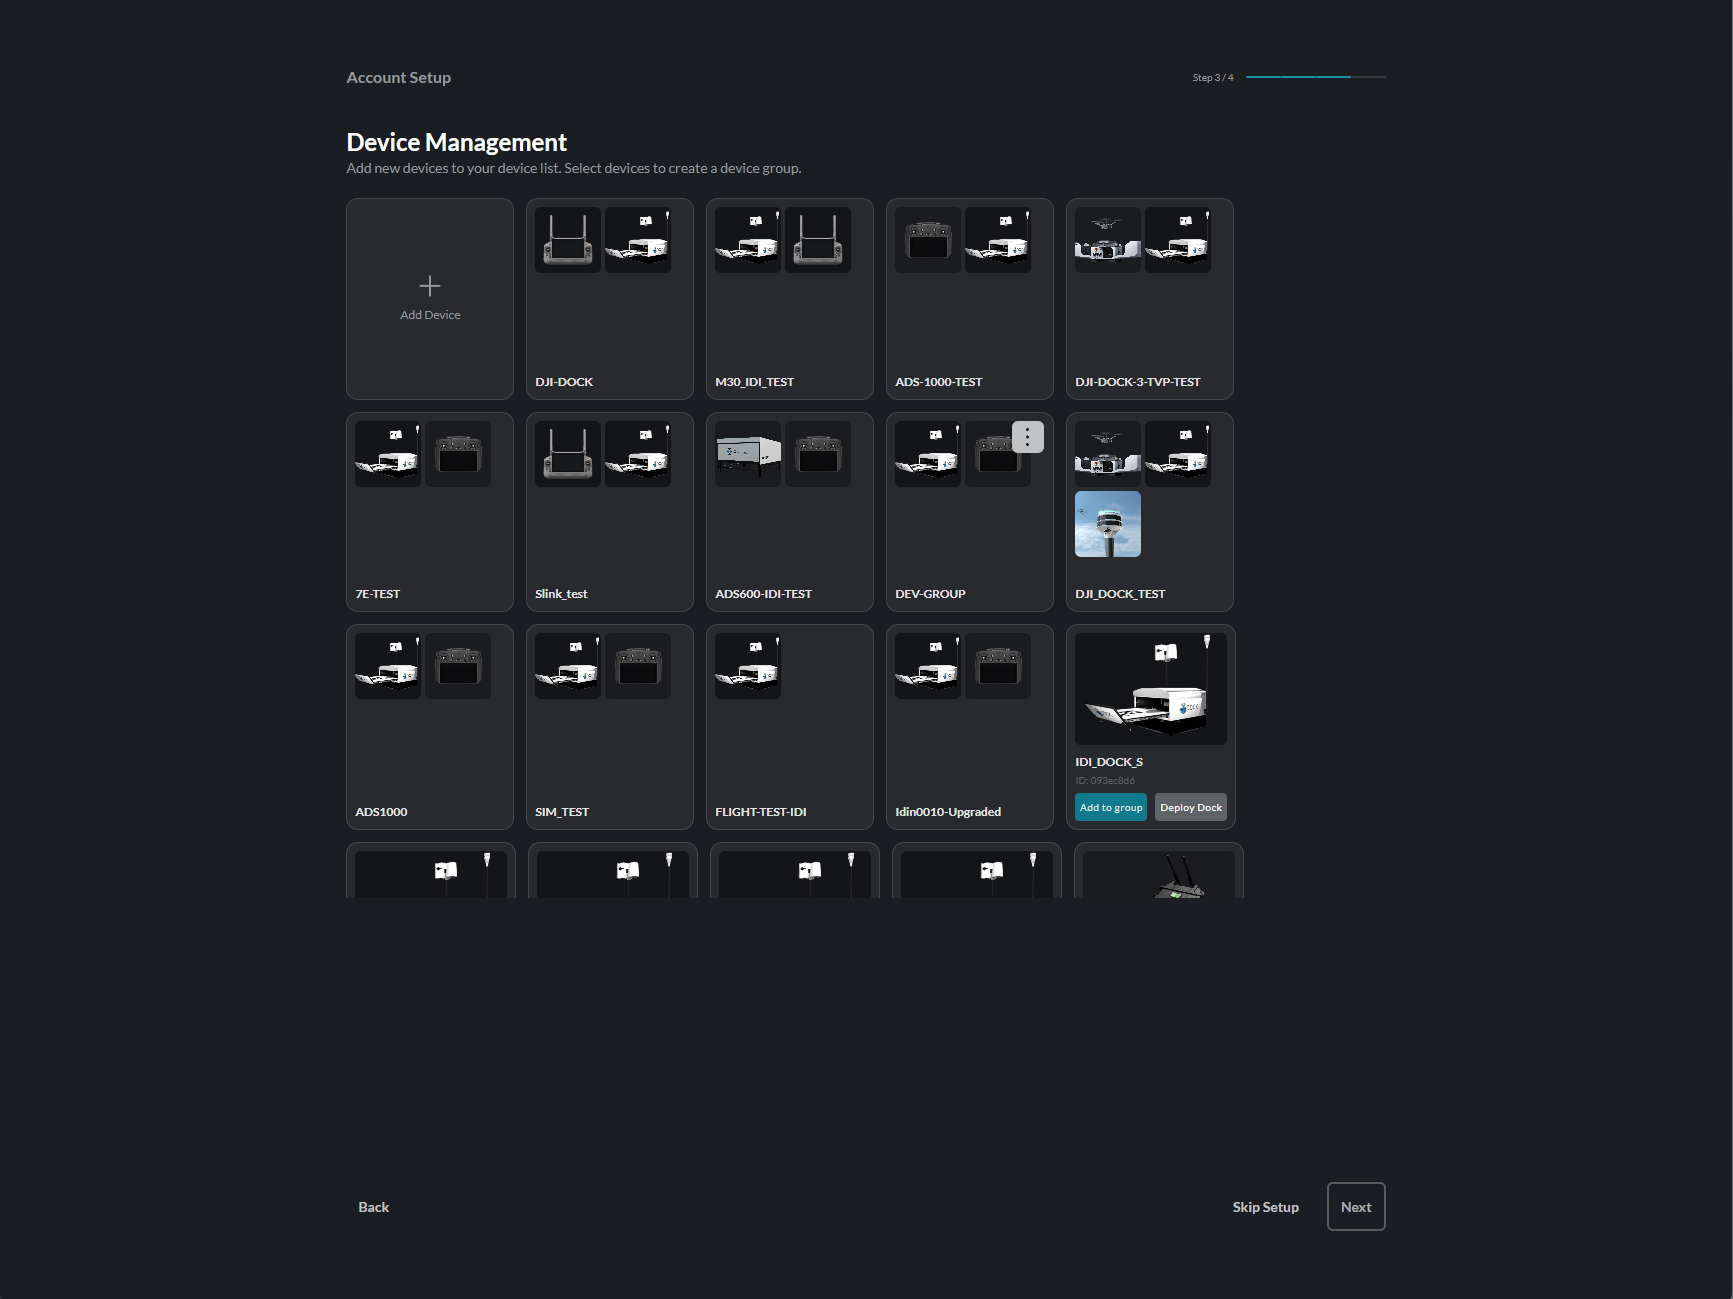
- Click Add Device to add new devices
- Select devices to create groups
- Click Skip Setup to configure later
- Click Next to proceed
User Management
Managers can invite team members:
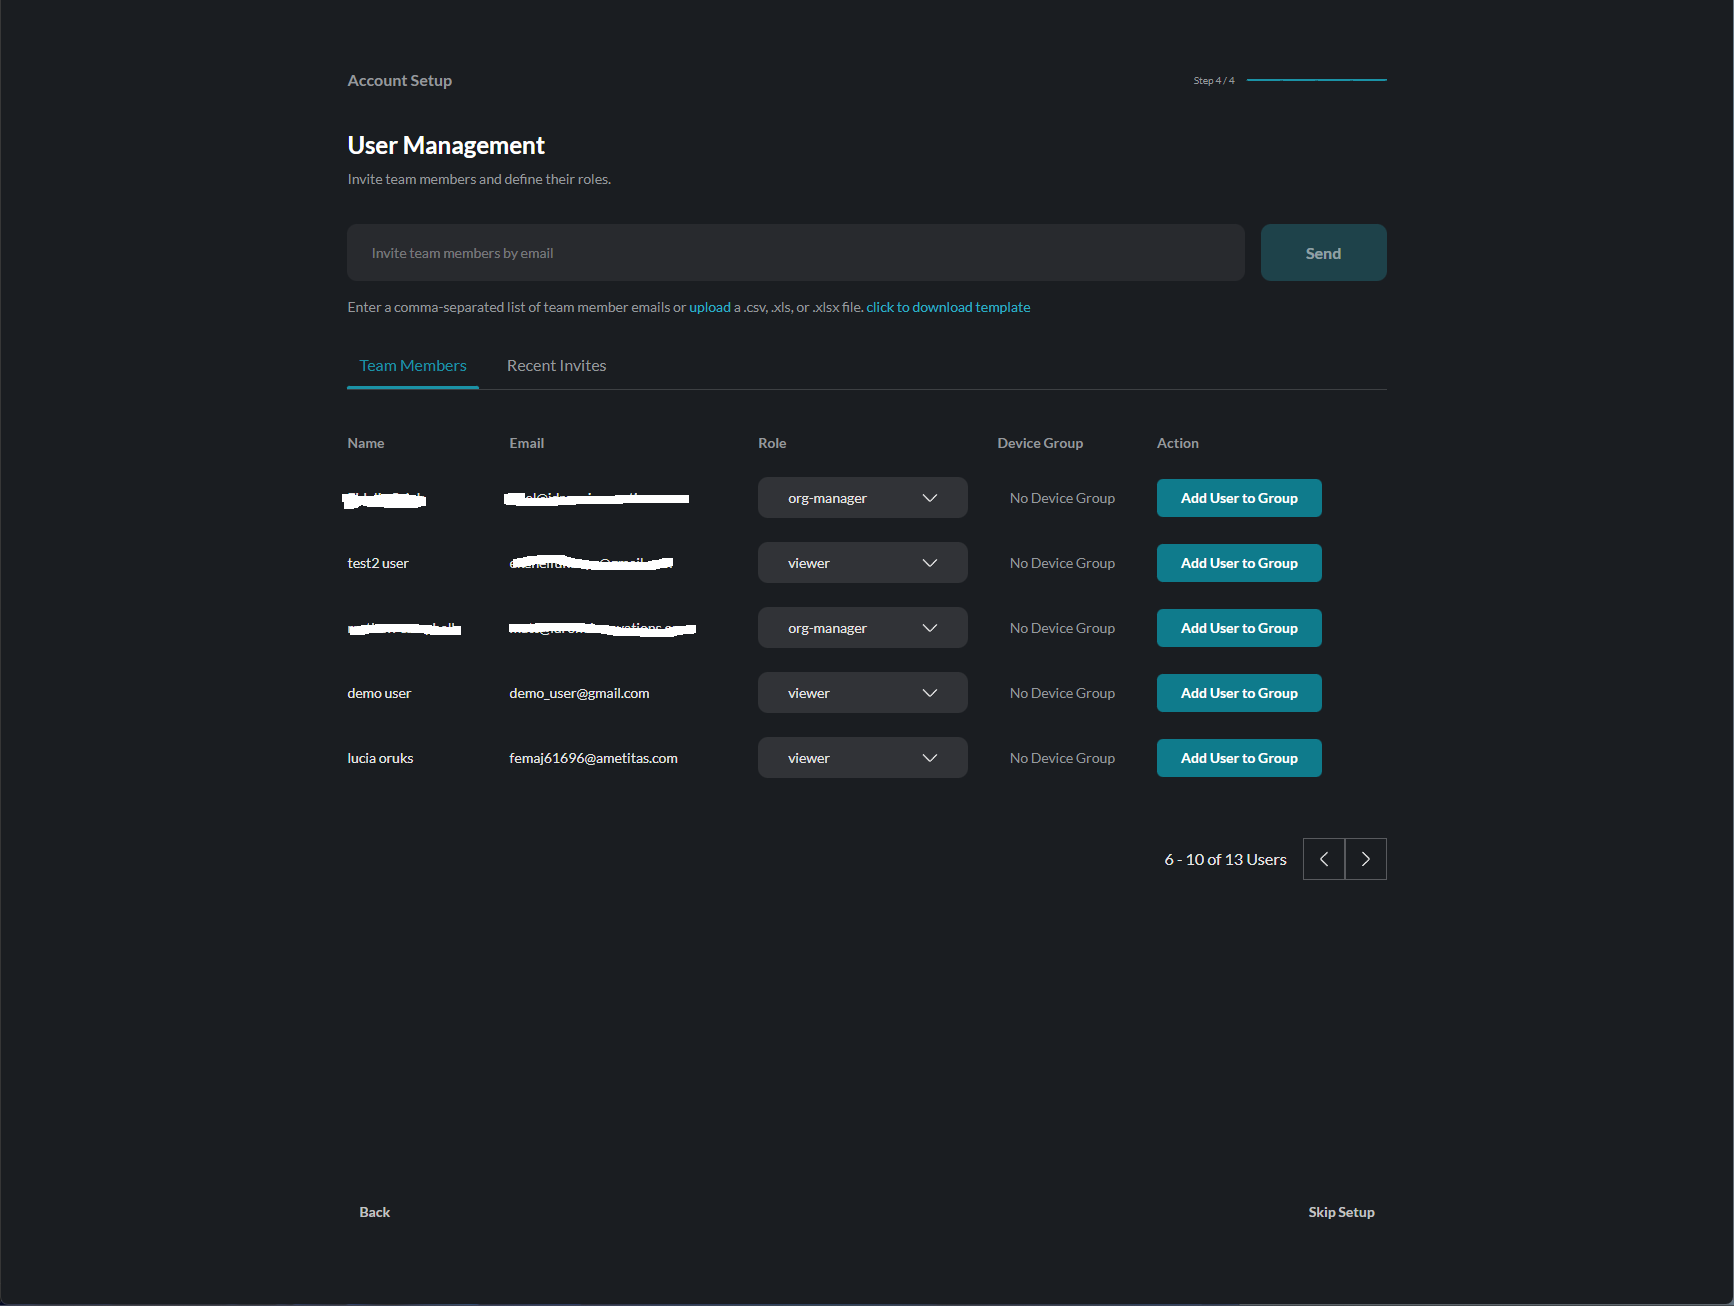
- Enter email addresses to invite users
- Assign roles to new members
- Click Skip Setup to invite later
- Click Next to proceed to Home
Home Dashboard
After completing setup, you’ll arrive at the Home dashboard:
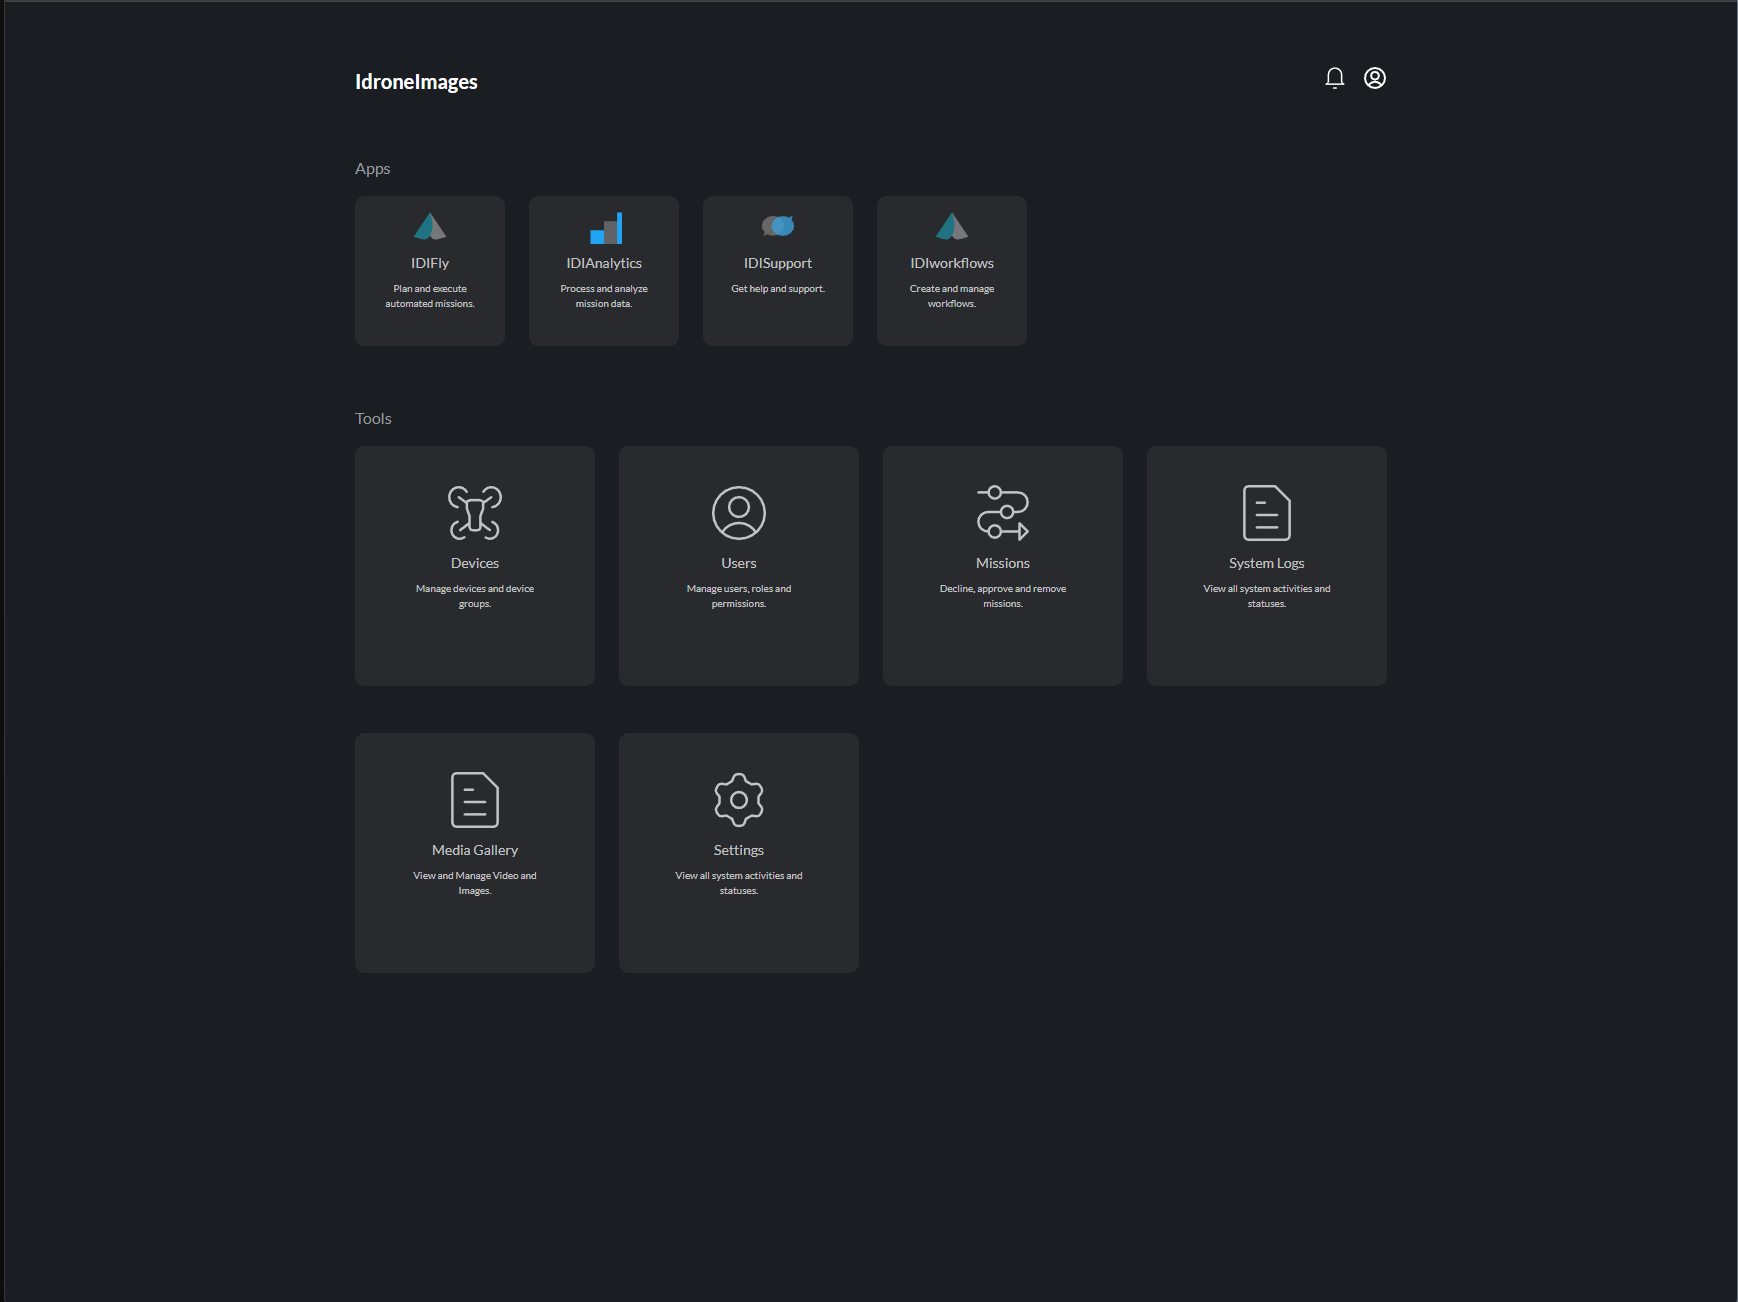
From here you can access:
Apps:
- IDIFly - Plan and execute automated missions
- IDIAnalytics - Process and analyze mission data
- IDISupport - Get help and support
- IDIWorkflows - Create and manage workflows
Tools:
- Devices - Manage devices and device groups
- Users - Manage users, roles and permissions
- Missions - Decline, approve and remove missions
- System Logs - View all system activities
- Media Gallery - View and manage video and images
- Settings - Configure your preferences
Editing Your Profile Later
To update your profile after initial setup:
- Click the Settings icon in the top-right corner
- Select the Profile tab
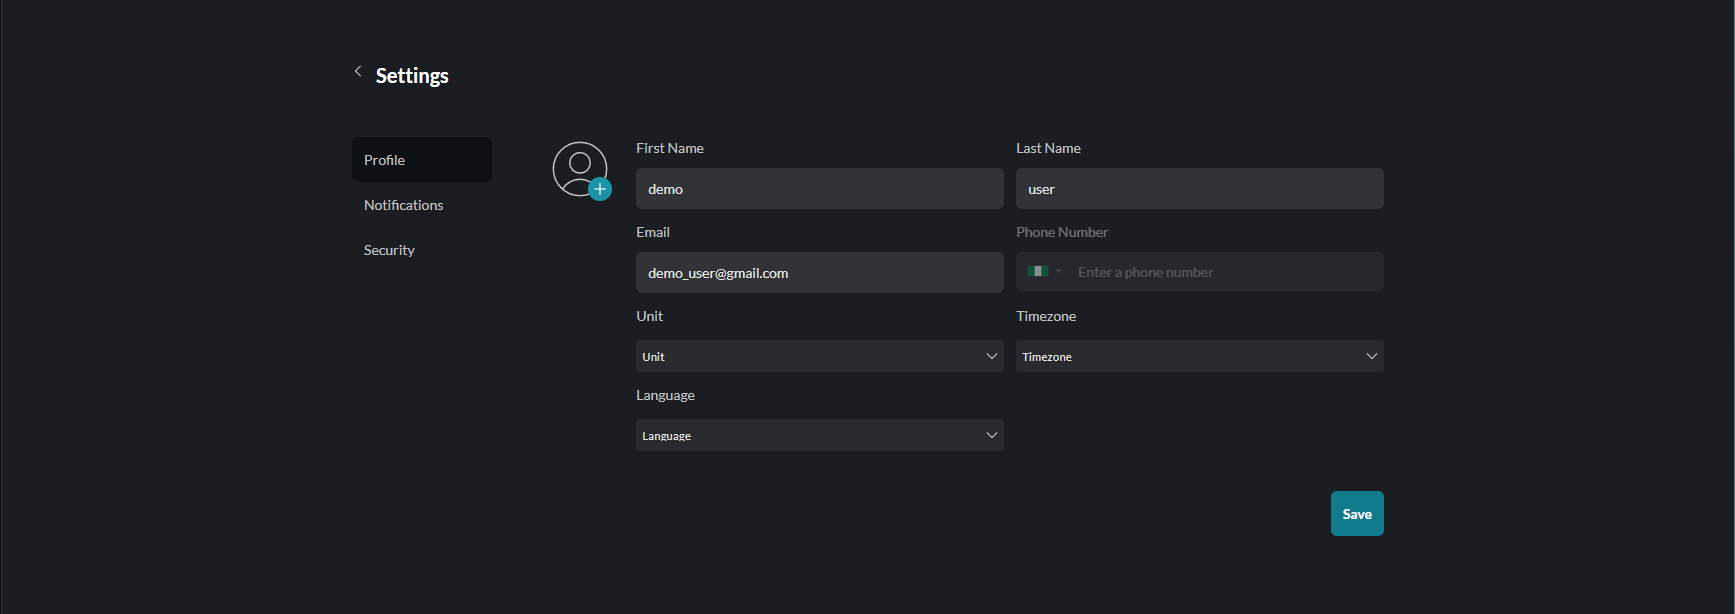
You can update:
- First Name and Last Name
- Phone Number
- Unit preferences
- Timezone
- Language
Your email address cannot be changed after account creation.